Paul Rowley, Approvals and Training Manager at Triton, talks installers through how to change a pressure relief device and replace a solenoid coil.
Q: How do I change a Pressure Relief Device (PRD) in an electric shower?
A: In cases where homeowners are experiencing water coming out of both the shower head and the point at which the hose connects to the body of the shower, this might be due to a build-up of pressure on the outlet related to issues with a PRD.
There could be a number of causes, including scale that may be blocking the shower head, or an issue with the hose. It’s worth checking both of these are clear and functioning correctly once the PRD has been replaced.
To change the PRD, you will need a Pozidriv two screwdriver and a Pozidriv one screwdriver.
Step one: Isolate electrical supply to the shower. Use the Pozidriv two screwdriver to remove the screws on the cover – at the top and the bottom. Take the cover off and locate the PRD, it will either be positioned at the front or the back of the outlet pipe, or on the heater can assembly itself.
Step two: Undo the two screws on the PRD and remove it – note that there are two types of PRD. One is light-coloured with a small rubber ball inside. If this blows, it could end up in the shower tray or in the bath. If this has happened, don’t re-use the same rubber ball because when these devices are manufactured, they are gauged to the right pressure. The new type comes with a diaphragm and the PRD body. On the new one, an O-ring is supplied, so you can discard the previous one if you’re replacing the older version.
Step three: Position the diaphragm on the PRD body and push it back into place while keeping your finger on it to hold it there before reapplying the screws. Wipe away any excess water on the unit. As water has been released and the pressure has been altered, you next need to make sure that the heat canister is full of water. To do this, set the cover so that it’s on the blue setting for cold, then re-attach the cover with the screws.
Step four: Turn the power back on so the shower light comes on. There should be no water leaking out of the PRD and a good flow of water coming out of the spray head at this point.
Q: How do I test and replace a solenoid coil in an electric shower?
A: This is another question commonly asked by installers who need to identify and replace a solenoid coil but don’t know where to start. If a shower is turned on and a light is illuminated but no water flows, a faulty solenoid coil could be the issue. To carry out any necessary checks, plumbers will need a number two Pozidriv, a large flat blade screwdriver, and a multimeter set on the ohms range.
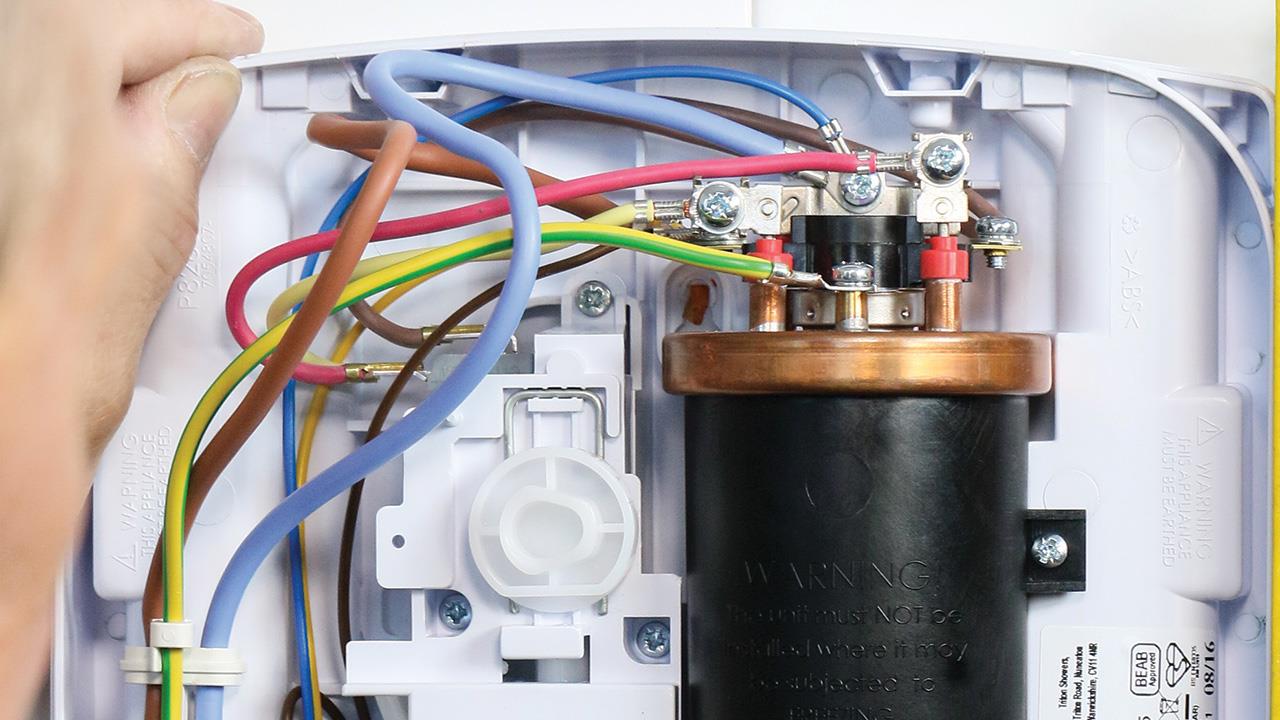
Step one: Isolate the electricity to the shower, then take out the screws at the top and at the bottom to remove the cover. Then take a look at the solenoid body and the coil, which is usually brown in colour, but may also be black or green, depending on the model. This component has two connectors on it to provide power, which can break and stop the water flow as a result.
Step two: With the power still off, set your multimeter to the ohms range. If the reading is between 3.5-3.7 across the two terminals then the coil is not the issue. However, if the reading is outside of this range then it’s likely to indicate an open circuit, which means the coil has a fault.
Step three: If the reading suggests a faulty coil then this needs to be replaced. Keeping the power off, remove both of the connectors from the coil. Take note of the positioning of the coil, as this can be in various different positions for different systems. Use the flat bladed screwdriver to remove it, placing the tool between the brown part of the coil and the body of the solenoid. Next perform a 90° twist to take the coil off the centre spigot by carefully pulling the body straight out.
Step four: Take the new body, push and twist it back onto the centre spigot. Press it down so that it’s completely flat, until it clicks into place. Next re-attach the connections. Don’t worry too much about which way round these go as you are dealing with a coil of wire, so the circuit will be completed either way. Replace the cover and screw it in place.
Step five: Apply power to the shower and select the on button. The unit should now be back in operation and water should flow.
If you'd like to keep up-to-date with the latest developments in the heating and plumbing industry, why not subscribe to our weekly newsletters? Just click the button below and you can ensure all the latest industry news and new product information lands in your inbox every week.
Subscribe to receive your free copy of HVP every month.