Installing a shower pump is a proven solution to poor water pressure in a gravity-fed system. However, it’s crucial that this installation is done correctly, to ensure the efficient running and longevity of the product.
Here is a list of checks you should undertake both before and during the installation of a new shower pump.
Ensure the location is suitable
A shower or whole house pump should be fitted 4-5m of measured pipe length from the hot water cylinder and a minimum of 600mm below the cold water cistern. However, the best position for the pump is as close as possible to the base of the hot water cylinder.
Another important consideration is protection from frost. Fitting a pump in a loft should be avoided wherever possible, as this may expose it to freezing conditions during the winter months.
Check the stored water capacity
It’s important to ensure that there is enough water capacity to deliver the increased usage of water that the shower pump will generate.
If the stored water is not sufficient for the property, the pump may run dry, which will cause damage to the shaft seals and ultimately reduce the effectiveness of the pump, as well as increasing the noise the product produces.
As a general rule of thumb, 227l (50 gallons) per bathroom and 136l (30 gallons) per shower should be enough to cover the property’s needs.
Check the water temperature
Water temperature must be kept to a maximum of 60-65ºC to avoid damage to the pump. If water temperature is something that you are not able to control, such as with a solid fuel hot water system, then there is a solution. You can install a blending valve along with the shower pump, which will bring the water temperature down to within the recommended limit.
Locate the ball valve
When connecting the pump to the cold water tank/cistern, it’s important to check the location of the float-operated valve and ensure that water is being taken from the opposite side of the tank to the valve’s inlet.
If the pump draws water from the cylinder directly below the ball valve inlet, it is likely that air will also be drawn into the pump, which can lead to air cavitation. This can cause damage and result in a very noisy pump.
Carry out soldering before fitting the pump
If flux residue happens to get on the pump, this can cause damage over the long term. If it is not properly cleaned off the pump, the flux will react with moisture particles in the air, and affect the pump’s materials.
Gradually, this corrodes the pump and, after a period of time, can cause pin-prick holes and cracks in the product, resulting in leaks.
However, it’s not enough to protect the pump and its hoses during the sweating process simply by covering it with some form of material, as flux spitting could still end up causing damage.
In fact, to ensure the flux avoids all contact with the pump and its hoses, the best method is to ensure all solder joints are completed and flux residues removed prior to fitting the pump.
To do this, ensure all fittings are in the correct place and ready to be soldered, before then removing the pump and hoses, placing them a distance away while the soldering is completed.
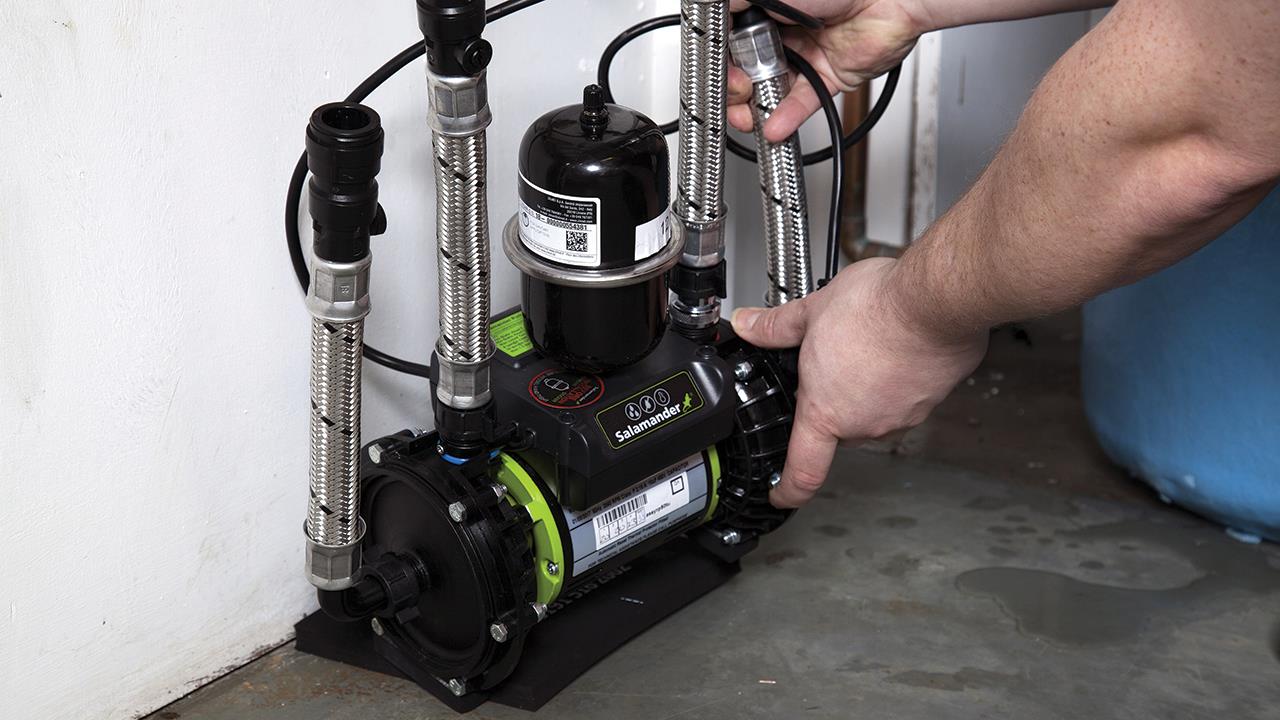
Don’t bend the hoses
The Salamander Pumps range features noise-reducing technology, including hoses which have been designed with some flexibility to reduce noise caused by vibration. However, bending them too far can become problematic; bent or twisted hoses will restrict the water flow, which in turn causes damage to the pump.
For this reason, the hoses should not be bent more than 30-35º during installation, if at all. It’s also important to remember that installing bent or twisted hoses will also invalidate the warranty of the product.
If you'd like to keep up-to-date with the latest developments in the heating and plumbing industry, why not subscribe to our weekly newsletters? Just click the button below and you can ensure all the latest industry news and new product information lands in your inbox every week.
Subscribe to receive your free copy of HVP every month.